









Download Output Portal for macOS
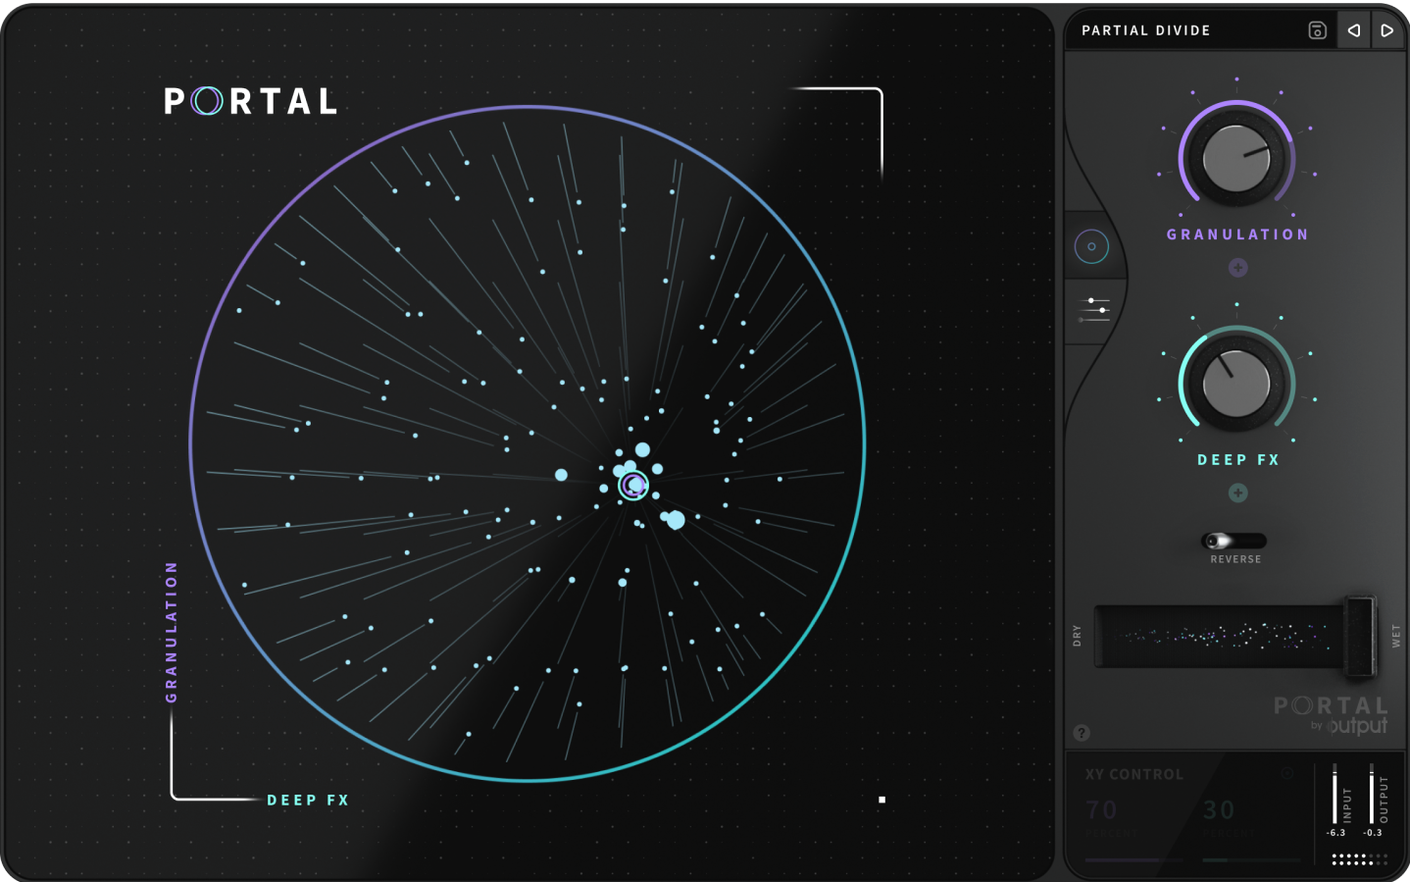
Sound designers and mix engineers who need to twist audio beyond typical pitch-shifters and delays will find Portal a go-to processor. It lives comfortably across a session — toss it on a vocal track to add wispy, trailing textures that stay in key, insert it on a drum bus to smear a hi-hat pattern into a rhythmic wash without losing sync, or strap it across an entire synth group for evolving, cinematic backgrounds.
Track and bus duties
Because Portal processes incoming audio rather than generating its own tones, it reacts musically to the source. The granular engine can freeze a moment of a guitar chord and stretch it into a pad while the dry signal plays on, all without altering the original duration. On instrument tracks, quick envelope variations create subtle, humanized movement that makes static VST lines breathe.
Working with live input
Feeding a microphone straight into Portal opens up real-time manipulation that re-synthesizes the signal to stay close to the input’s character. You can shift a sung note’s pitch while keeping the phrasing tight, or break a spoken word into a cloud of grains that still reads as the original voice. It is just as effective on drum samples, turning a simple snare into a stretched, textured hit that remains locked to tempo.
Snags that tend to trip people up
Grabbing a plugin as deep as Portal sometimes means hitting a wall before you hear the magic. The most common headache is a completely silent output, which almost always traces back to the dry/wet mix knob sitting at 0% or the grain volume being pulled too low. Crank the mix up past 50% and check that the main output dial hasn’t been nudged down by accident — it’s a quick fix that saves a lot of head-scratching.
Another frequent hiccup involves the tempo sync behaving unpredictably. If grains seem to stutter out of time, you likely have the internal clock set to a free-running rate while your DAW is sending a locked BPM. Tap the sync toggle near the time section so Portal follows your session’s transport, and the rhythmic chaos should tighten right up. On the flip side, leaving sync engaged when you want a loose, unmoored stretch will fight your automation — switch it off for those washy, unsynchronized tails.
Live input monitoring can also introduce a phasing effect that sounds thin. This usually happens when the dry signal bleeds through alongside the processed grains at nearly equal levels. Lower the input gain slightly and push the grain volume instead, which keeps the transformed texture prominent without doubling up the original. And if you're grabbing the Output Portal torrent or a Portal Mac torrent to explore the engine, you'll still want to dial these basics in before judging what it can do.
Turning a vocal chop into a pitched pad: a start-to-finish workflow
Say you’ve got a dry vocal phrase and you want a lush, tuned backing texture that shifts with your chord progression. Load Portal on a send, not an insert, so you can blend the effect independently. Set the mix to 100% wet on the plugin itself and pull the send fader down to about -12 dB for now.
First, grab a single word or syllable from the vocal by setting a short grain size — around 80 ms works well for intelligibility. Increase the density until grains overlap into a continuous wash, then pull the time knob back to slow the playback rate to about half-speed. The voice will smear into a choir-like hum. Now lock the pitch to the scale of your track using the built-in scale quantizer; choose minor or major depending on the song’s mood. As chords change, the grains re-pitch gracefully without glitching.
Add subtle movement by assigning an LFO to the grain position parameter at a slow rate. Bring the send fader up during a bridge or chorus and automate the reverb tail downstream for a cinematic lift. By the end, you’ve built a responsive pad from a single take, all anchored to the key of the project.
A session with Portal, moment by moment
I drag Portal onto a drum loop that feels too rigid. The track is set to 110 BPM, and I want something that breathes. I open the plugin and immediately flip the sync toggle off — I’m not chasing the grid here, just texture.
I start with grain size around 120 ms and density at roughly 40%. The kick and snare start to blur into a grainy halo. I pull the time knob way down to roughly 0.3x speed, and the transients melt into a slow-motion smear. It’s cool, but the low end is getting muddy, so I dial the onboard high-pass filter up to 200 Hz and let the kick’s body disappear while the upper crackle stays lush.
Next, I route a small amount of the original dry loop back into the channel so the attack stays punchy underneath the wash. I grab the envelope section and add a little attack time to the grains so they swell in gently — it makes the pattern feel less like a glitch and more like a pad that happens to have rhythm. A touch of the onboard reverb broadens the stereo field, and I nudge the variation dial to give each grain a slightly different pitch. The loop now pulses with an organic, shifting quality that I couldn’t script with MIDI.
After about eight minutes of tweaking, I bounce the processed take to a new audio track and chop out the best four-bar section. The original loop stays muted, and the granular bounce becomes the foundation of the verse. For anyone who grabbed a portal torrent to experiment, this kind of destructive-resynthesis workflow is where the plugin really earns its keep — it pushes past simple delay lines into proper sound redesign territory. By the time I move on to the next section, the transformed loop has set a mood the stock samples never hinted at.
- macOS (Intel and Apple Silicon)
- Compatible VST or AU host application
Also on readers' docks
Sign in or create an account to leave a comment.
No comments yet. Tell me how it got on with your other devices.
More in VST Plugins
See all Omnisphere
3.0.2c VST Plugins
205 MB
Omnisphere
3.0.2c VST Plugins
205 MB
 oeksound Spiff
1.4.4 VST Plugins
140 MB
oeksound Spiff
1.4.4 VST Plugins
140 MB
 Nuro Audio XVOX Pro
1.5.2 VST Plugins
625 MB
Nuro Audio XVOX Pro
1.5.2 VST Plugins
625 MB
 Nuro Audio Xpitch
1.5.2 VST Plugins
190 MB
Nuro Audio Xpitch
1.5.2 VST Plugins
190 MB
 Nudist Audio Nudistort
1.2.5 VST Plugins
45 MB
Nudist Audio Nudistort
1.2.5 VST Plugins
45 MB
 noteGRABBER
2.0.0 VST Plugins
35 MB
noteGRABBER
2.0.0 VST Plugins
35 MB
 Neural DSP Soldano SLO-100 X
1.0.0 VST Plugins
340 MB
Neural DSP Soldano SLO-100 X
1.0.0 VST Plugins
340 MB
 Neural DSP Parallax X
1.0.0 VST Plugins
179 MB
Neural DSP Parallax X
1.0.0 VST Plugins
179 MB