









Download Adobe Dimension for macOS
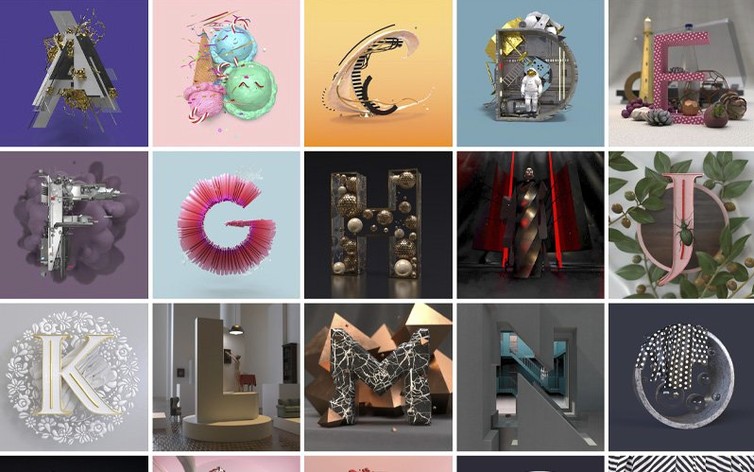

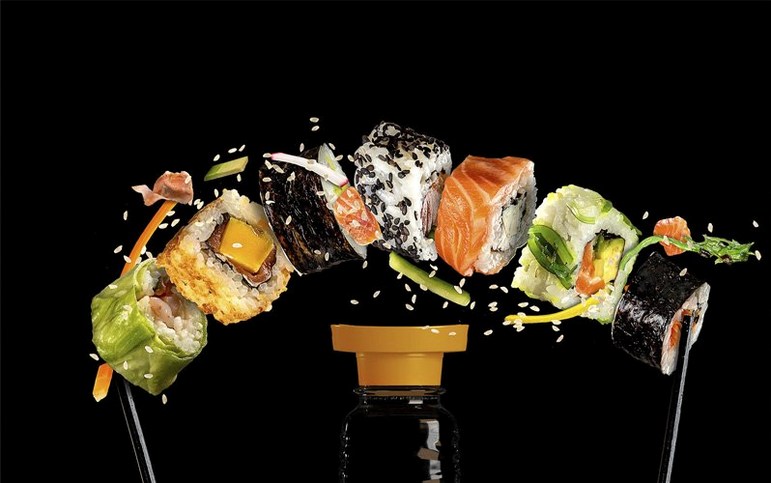
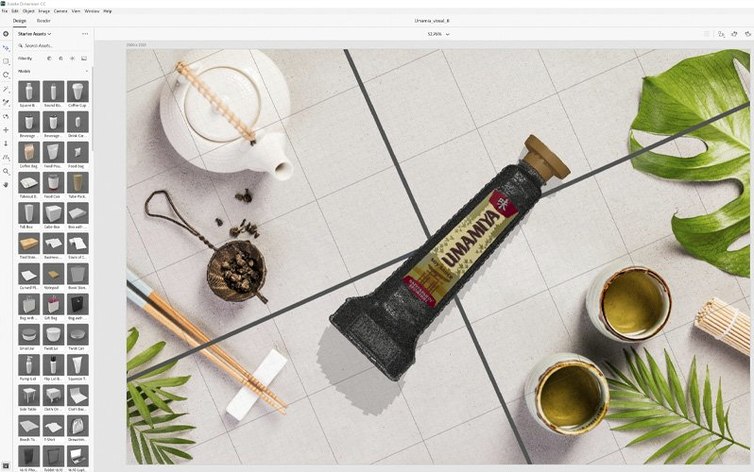
2026-01-21 marks the date Adobe pushed out version 4.1.7, and the headline is one of maintenance: resolved security vulnerabilities. Adobe Dimension itself stays the focused 3D staging tool it has been for a while—it loads your saved documents, lets you place vector artwork onto models, and automatically adjusts lighting, perspective, and shadows to match the material and background you pick. It is not trying to be a full modeling suite. Instead, it gives you a way to build brand visualizations, product mockups, and illustrations where 2D and 3D assets sit together naturally. Export a scene and you can keep working on it in Adobe Photoshop CC, which keeps Dimension neatly inside a broader creative workflow.
Roughing Out Product Shots and Packaging Concepts
- Blocking out product shots and packaging concepts quickly
- Placing logos or vector artwork directly onto 3D models
- Building photorealistic scenes that combine 2D and 3D elements
- Exporting scenes for layered Photoshop work
Intel-Only on Mac, With No Apple Silicon Roadmap
- Runs on Intel-based Macs only; no Apple Silicon native support listed
- Requires macOS 11 or later
- Adobe treats it as a supported product with technical and security updates, but feature additions are not highlighted
Starting a Scene With a Backplate Image
I open Dimension and start with a fresh scene. The canvas defaults to a neutral grey, and I usually drag in a background image first—something from a recent photoshoot or a stock photo of a desk setup. Dimension snaps the camera and lighting to match the perspective and shadows in that image almost instantly, which saves me from eyeballing angles for ten minutes.
Next, I pull in a 3D model. I might grab one from my saved library or browse Adobe Stock models optimized for Dimension right from the panel. A simple bottle, a box, or a tube—whatever fits the packaging concept I am working on. I place the model roughly where I want it, then adjust its position with the on-canvas gizmo. The gizmo in Dimension is uncluttered: move, rotate, scale, and you are not wading through a dozen axis handles.
The real fun starts when I drop vector artwork onto the model. I drag an .ai or .svg logo straight from Finder onto the bottle or box surface. Dimension maps it as a decal and respects the curve of the model. I tweak opacity, blend mode, and placement until the logo sits like it was printed there. The material panel lets me switch the object's finish quickly—matte plastic, glossy glass, rough cardboard—and the lighting recalculates shadows on the fly.
Once the scene looks right, I pick a camera angle, bump the render quality up to high, and let it process. The preview is decent for layout work, but the final render shows off the subtle reflections and soft shadows that make a mockup feel real. I export a PSD with layers and open it in Photoshop for any final color grading or retouching.
A packaging designer's afternoon
Imagine a packaging designer at a small cosmetics brand. She has a new label design laid out in Illustrator and needs client mockups by end of day. She launches Dimension, selects a cylindrical bottle model and a wooden-table background image. The software reads the background's light direction and warms the scene automatically.
She drags her label artwork onto the bottle, adjusts the wrap, and adds a second model—a small box for the gift set. She swaps the box material to a textured paper preset and places a version of the logo on the lid. In under forty minutes she has three camera angles rendered with consistent lighting and shadows. She exports layered PSDs to Photoshop for a quick curves adjustment, then sends JPEG previews to the client. No 3D modeling experience required, and no waiting for a specialist to set up a scene in a heavier DCC tool.
Curate a Starter Kit of Models and Materials
A few things help the first few sessions go smoothly. First, build a small starter library of models and materials you like. The Adobe Stock search inside Dimension is useful, but downloading five or six go-to objects—a standard bottle, a box, a pouch, a tube—means you are not hunting mid-project. Save them in a local folder and use the "Add assets" option to keep them reachable.
Second, get comfortable with the camera match feature early. Drop in a background, click "Match Image," and watch Dimension generate a perspective grid. You can tweak it manually, but the automatic guess is often close enough. This single feature cuts layout time dramatically when you are placing products into real photo backdrops.
Third, learn the render preview vs. final render trade-off. Keep the viewport on low or medium quality while positioning objects—the real-time feedback is fast and responsive. Switch to high quality only for the final export. On an Intel Mac, this keeps the app snappy even with multiple models in the scene.
Finally, explore the Photoshop export early. Dimension writes out separate layers for the model, shadows, reflections, and background when you export as a PSD. Knowing what each layer contains lets you plan exactly what you will refine in Photoshop later—and what you can finalize inside Dimension before exporting.
Version 4.1.7 is a security update:
- Resolved security vulnerabilities.
- macOS 11 or later
- Intel-based Mac
Also on readers' docks
Sign in or create an account to leave a comment.
No comments yet. Tell me how it got on with your other devices.
More in CAD & 3D
See all Updated Adobe Substance 3D Painter
12.1.5 CAD & 3D
3 GB
Updated Adobe Substance 3D Painter
12.1.5 CAD & 3D
3 GB
 Updated Adobe Substance 3D Sampler
6.0.4 CAD & 3D
675 MB
Updated Adobe Substance 3D Sampler
6.0.4 CAD & 3D
675 MB
 ArchiCAD
29.2.1 CAD & 3D
5.1 GB
ArchiCAD
29.2.1 CAD & 3D
5.1 GB
 Artlantis
9.5.2.32853 CAD & 3D
370 MB
Artlantis
9.5.2.32853 CAD & 3D
370 MB
 AutoCAD
2027 CAD & 3D
2.3 GB
AutoCAD
2027 CAD & 3D
2.3 GB
 Autodesk Flame
2027.1 CAD & 3D
8.4 GB
Autodesk Flame
2027.1 CAD & 3D
8.4 GB
 BricsCAD
24.2.04-05-1 CAD & 3D
1.1 GB
BricsCAD
24.2.04-05-1 CAD & 3D
1.1 GB
 CorelCAD
2022.5 Build 22.3.1.4090 CAD & 3D
293 MB
CorelCAD
2022.5 Build 22.3.1.4090 CAD & 3D
293 MB