








Download Imagenomic Plugin Suite for macOS
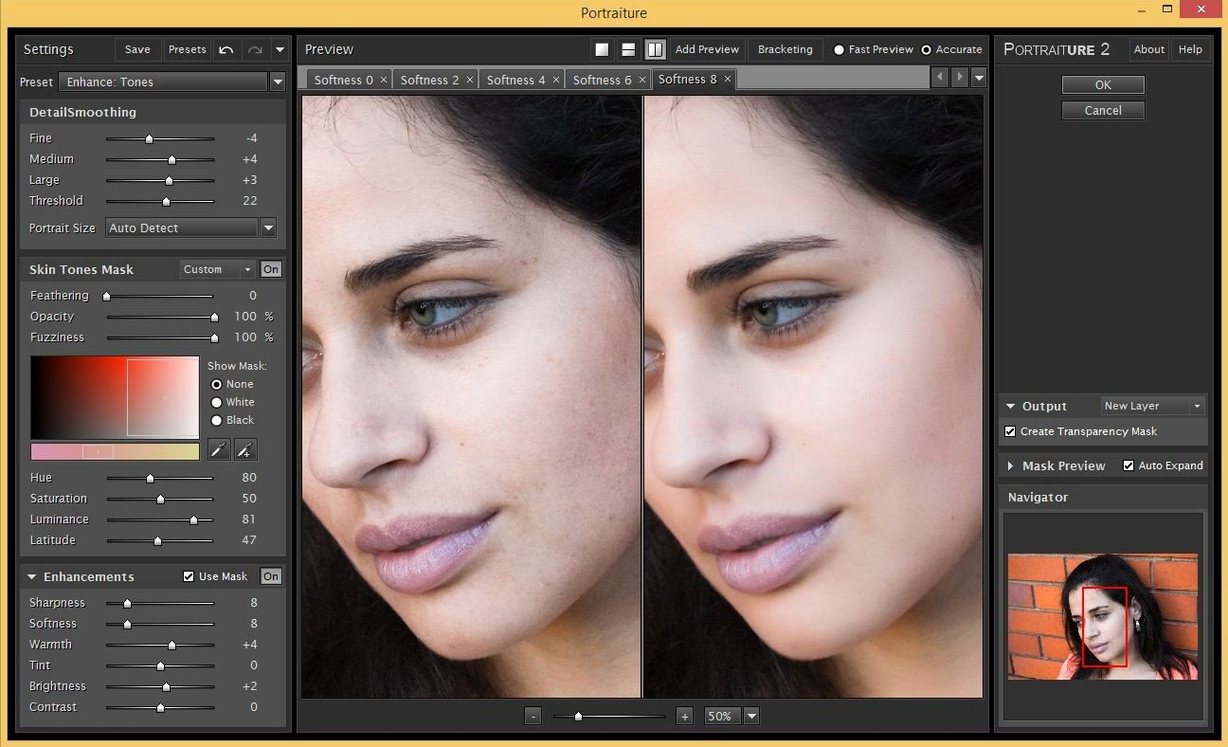
Portrait and wedding photographers reach for the Imagenomic Plugin Suite when a shot needs cleanup without losing skin texture. The bundle gathers Portraiture for retouching, Noiseware for noise reduction, and Realgrain for black-and-white, toning, film, and grain effects into one install.
Compatibility comes first here. Imagenomic lists the Photo Suite as working with Photoshop, Lightroom Classic, and Affinity on Mac, which covers most editing setups. Noise reduction runs through Noiseware as a plugin and a standalone module, so it fits even when you are not inside a host app. Realgrain handles the analog side, letting you push monochrome conversions and film-style grain without leaving your normal workflow.
The suite supports macOS 13 and later, while Imagenomic's product page currently lists macOS 15+ for the Photo Suite. Both Intel and Apple Silicon Macs are covered. English is the interface language.
How the Imagenomic suite stacks up against Nik Collection, Topaz, and ON1
When I line up the Imagenomic Plugin Suite alongside other Mac plugin bundles, the first thing I notice is focus. The Nik Collection and the ON1 plugins spread themselves across more ground — Nik gives you seven or eight tools, ON1 bundles a full raw processor. But Imagenomic keeps it at three: Portraiture, Noiseware, and Realgrain. That lean approach changes how a session feels.
Portraiture versus Nik Silver Efex or ON1 Portrait AI is a real contrast. Those apps lean on auto-masking that can feel like you have handed the wheel to a machine. Portraiture still does the heavy lifting on skin smoothing and healing, but it leaves the retoucher in charge of what gets softened. The result is less of that waxy, over-processed look that can creep into batch edits.
Noiseware is where Imagenomic pulls ahead for me. It handles high-ISO noise with a light touch that preserves detail in eyelashes and fabric texture — areas where Topaz DeNoise AI sometimes over-smooths in its default pass. Topaz gets there with tuning, but Noiseware’s default profiles are surprisingly ready to go. If you often push past ISO 6400 on an older body, you will notice the difference in the first ten minutes.
Realgrain stands apart because film grain and toning are its entire job. Nik Analog Efex is more playful and preset-driven; Realgrain is for photographers who want grain that responds to midtone and shadow density like real film stock. It is less about slapping a filter on and more about building a black-and-white conversion that breathes.
The trade-off is breadth. You will not find HDR merging, sharpening presets, or creative color looks inside the Imagenomic suite. If you want an all-in-one effects lab, the wider bundles have more buttons to press. But for skin, noise, and grain — three tasks that eat up real editing time — Imagenomic’s tight focus wins out.
Drag plugins to Applications after the Terminal bypass
Once you have mounted the disk image, run the Open Gatekeeper friendly command, and pressed Enter in Terminal to bypass Gatekeeper, drag the plugins to your Applications folder and launch your host of choice. Photoshop, Lightroom Classic, or Affinity — the suite slots into all three. Here is what I would do in the first couple of hours.
Run one image through all three plugins. Pick a raw file with skin tones, some shadow noise, and an interesting background. Open Portraiture first and apply a light preset, then send the same file to Noiseware for luminance noise cleanup, and finish with Realgrain for a subtle 35mm grain plate. This sequence teaches you how the plugins hand off work to each other without flattening the image.
Build two Noiseware presets. Make one for ISO 3200–6400 shots with strong luminance reduction but fine detail protection, and one for mild color noise cleanup at lower ISOs. Having those ready means you batch-sync in Lightroom later without second-guessing every slider.
Test Portraiture on different skin tones and lighting. The plugin interprets texture differently in soft window light versus direct flash. Spend twenty minutes dragging the threshold and smoothing sliders on three different portraits so you learn where the artifact line sits. That muscle memory pays off when you are editing a full gallery.
Try Realgrain as a finishing layer, not a starting point. New users sometimes apply grain right after raw conversion and then fight it through every adjustment layer. Put Realgrain last in your stack. Let the toning panel push shadows toward cool or warm before you commit to the grain structure.
Default Portraiture preset over-smoothing mistake
The most common slip I see is over-smoothing with Portraiture on the default preset. That preset is a starting point, not a one-click solution. Beginners apply it across a whole session and end up with faces that look like porcelain. Pull the smoothing slider back to 60–70% and mask out eyes, lips, and hair edges. Skin should still look like skin.
Another trap: running Noiseware at full strength on every image. Heavy noise reduction eats fine detail — eyelashes, fabric weave, distant foliage. Use it at full power only on genuinely noisy frames. For anything shot under ISO 800, the lighter profile keeps texture intact while cleaning up color blotches.
With Realgrain, beginners often dial grain size too high for the output medium. Grain that looks atmospheric on a 27-inch display can turn into distracting sand on a phone screen. Zoom to 100% and then step back to fit-on-screen view before locking in the grain settings. If you are printing, a test strip on matte paper tells you more than any screen preview.
A workflow mistake worth flagging: applying the plugins in the wrong order. Noise reduction before skin softening gives Portraiture cleaner data to work with, which means fewer smoothing artifacts. Grain goes last, because you do not want to smooth or denoise the grain you just added. Get the sequence right — Noiseware, then Portraiture, then Realgrain — and your layers stay cooperative instead of fighting each other.
Finally, some folks search for an imagenomic professional plugin suite crack or grab an imagenomic torrent without realizing how deeply these plugins integrate with host apps. A mismatched or modified version can actually work fine if you match the right host version and plugin build — just double-check compatibility before a deadline session. The official build from the imagenomic professional plugin suite installer keeps the plugins registered correctly across Lightroom Classic and Affinity, which matters when you are syncing edits across a catalog. If you have been chasing an imagenomic video suite crack by mistake, note that this bundle is purely for stills — no video noise reduction here, just three focused tools for photography on imagenomic for mac.
Anyone deep in a Photoshop or Affinity routine who wants retouching, noise control, and film looks in one toolkit will feel at home here.
- macOS 13 or later (macOS 15+ listed on the product page)
- Intel or Apple Silicon Mac
- English interface
Questions people ask
Which Mac apps does the Imagenomic Plugin Suite work with?
Imagenomic lists the Photo Suite as working with Photoshop, Lightroom Classic, and Affinity on Mac.
Does the suite run on Apple Silicon Macs?
Yes, the plugins support both Intel and Apple Silicon architecture, with macOS 13 listed as the minimum and macOS 15+ noted on the product page.
What does Realgrain do?
Realgrain handles black-and-white conversion, toning, film looks, and grain effects inside the plugin suite.
Also on readers' docks
Sign in or create an account to leave a comment.
No comments yet. Tell me how it got on with your other devices.
More in Mac Apps
See all iExplorer
4.6.0 Mac Apps
30 MB
iExplorer
4.6.0 Mac Apps
30 MB
 Imagenomic Portraiture
4.5 Build 4501 Mac Apps
65 MB
Imagenomic Portraiture
4.5 Build 4501 Mac Apps
65 MB
 iDownerGo
10.15.0 Mac Apps
76 MB
iDownerGo
10.15.0 Mac Apps
76 MB
 iMazing
3.6.5 Mac Apps
242 MB
iMazing
3.6.5 Mac Apps
242 MB
 IDA Pro
9.4.260713.a97520e5 Mac Apps
947 MB
IDA Pro
9.4.260713.a97520e5 Mac Apps
947 MB
 Infuse Pro
8.5.5 CRACKFIX Mac Apps
90 MB
Infuse Pro
8.5.5 CRACKFIX Mac Apps
90 MB
 HitPaw Watermark Remover
2.4.7 Mac Apps
290 MB
HitPaw Watermark Remover
2.4.7 Mac Apps
290 MB
 HitPaw Video Converter
4.5.0 Mac Apps
577 MB
HitPaw Video Converter
4.5.0 Mac Apps
577 MB