









Download Adobe Animate for macOS
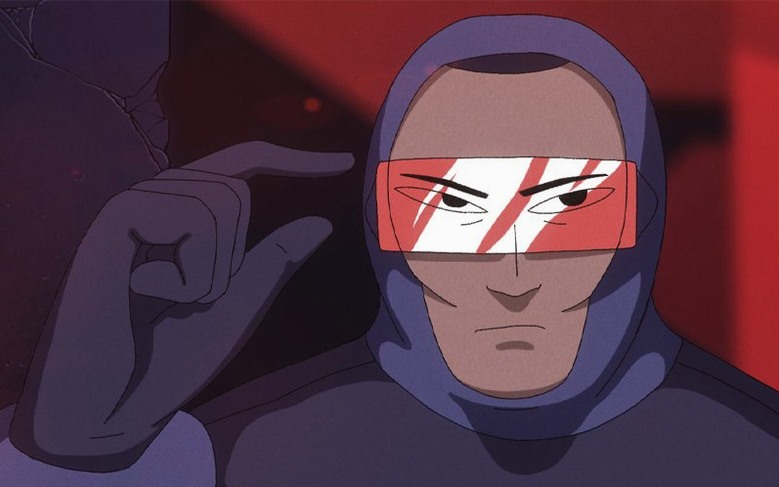



When a still illustration isn't enough and full video feels too heavy, you need a tool built for lightweight, living artwork.
Frame-by-frame animation — the classic technique for blinking eyes, speaking mouths, and walking loops. You control each drawing's timing directly on the timeline.
Interactive vector animation — create game interfaces, clickable ad banners, and app micro-interactions that stay razor-sharp at any screen size.
Multi-format export — ship your work as HTML5 Canvas for modern browsers, WebGL for GPU-powered experiences, or SVG for static assets. Legacy AIR and Flash formats are still there when you need them.
Built-in illustration tools — sketch and refine characters right on the stage with pressure-sensitive brushes and shape tweening before a single keyframe exists.
Creative Cloud integration — your color palettes, brushes, and assets follow you across Illustrator and Photoshop so the design-to-animation pipeline stays fluid.
Give yourself a quiet first afternoon with the app — no deadline, no client file, just a blank canvas. The goal isn't to build something impressive. It's to build muscle memory for the tools you'll reach for a hundred times a day.
Here's a short hit list for those early sessions:
- Draw a simple shape and tween it. A circle sliding across the stage teaches you more about the timeline, keyframes, and easing than any tutorial video. Right-click the span between two keyframes and pick a shape or classic tween — feel how each one handles differently.
- Learn the F5 / F6 / F7 rhythm. These three keys control your timeline flow: F5 adds frames, F6 creates a keyframe with content carried forward, and F7 drops a blank keyframe. Drill them until your left hand doesn't pause to think.
- Organize your Library from frame one. Dumping every symbol into a single folder is a headache by scene three. Create folders for backgrounds, characters, UI elements, and audio before your project gets legs.
- Test a publish early. Even if it's just a bouncing ball, export to HTML5 Canvas and open it in a browser. Knowing how your stage translates to the real output prevents nasty surprises when deadlines loom.
How Animate stacks up against similar Mac apps
Plenty of animation tools run on macOS, but they don't all speak the same creative language. Knowing where Animate fits helps you pick the right one for the job — or pair them together without overlap.
Adobe Animate vs. Toon Boom Harmony
Harmony is the heavyweight in frame-by-frame character animation, especially for TV and film productions that demand advanced rigging and a node-based compositor. Animate feels lighter and more immediate for interactive projects. Where Harmony builds a traditional cel pipeline, Animate puts HTML5 and WebGL exports front and centre — a bigger deal when your animation needs to respond to taps and clicks. If your day involves game UI mockups or web banners, Animate stays nimbler.
Adobe Animate vs. Procreate Dreams
Procreate Dreams lives on iPad and leans hard into hand-drawn, painterly motion with a gesture-first interface. Animate has the vector precision and the coding layer that Dreams doesn't touch. You can't add interactive hit areas or export a clickable ad from Dreams. For illustrators who animate storyboard-style scenes, Dreams is a joy. For anyone who needs a functional button inside their animation, Animate is still the pick.
Adobe Animate vs. Blender (Grease Pencil)
Blender's Grease Pencil brings 2D drawing into a 3D space, and its toolset keeps growing with every release. The crossover area is mainly indie game development — Blender handles 3D environments and 2D characters in one file, while Animate excels at sprite sheets, UI animations, and vector exports that stay small. If your project never goes near a polygon, Animate keeps the complexity lower.
Switch the default document type before your first project
Out of the box, Animate makes a few assumptions about your workspace that are worth adjusting before you build anything serious.
- Switch the default document type. When you launch the app and create a new file, it may default to ActionScript 3.0 or an AIR-based preset. Head to the Welcome screen or Preferences and set HTML5 Canvas as your go-to template. It's the format most modern projects will target, and it silences the temptation to lean on features that won't export cleanly.
- Adjust the onion skin range and tint. The default two-frame onion skin works for simple motion, but character walk cycles benefit from seeing three or four frames ahead and behind. In the timeline panel's onion skin options, widen the range and switch the tint to a color that contrasts clearly with your line art.
- Turn off "Scale content with stage" until you need it. Found under the document properties, this setting can mangle your element positions when you resize the canvas for a different output resolution. Keep it off during the rough layout phase, then toggle it deliberately when you're finalizing export dimensions.
- Map the Brush tool's smoothing to something comfortable. In the Properties panel with the Brush selected, smoothing defaults to a middle value. Drag it lower if you want responsive, sketch-like strokes; push it higher for clean, swooping curves on stylized character work. There's no universal sweet spot — test it with your drawing style and your tablet's pressure curve.
Symbols refuse to tween on the timeline
Every piece of animation software has its quirks, and Animate's quirks tend to cluster around a few predictable spots. Here's what crops up most often and how to handle it.
Your symbols refuse to tween. You've dropped two keyframes and applied a motion tween, but the object sits frozen. Check the timeline — does the tween span show a solid arrow or a dashed line? A dashed line means Animate doesn't see compatible content. The most common culprit: you placed a raw shape on one keyframe and a symbol instance on the other. Motion tweens work only with symbol instances. Break the shape apart (Cmd+B) and convert it to a graphic symbol, then reapply the tween.
Animate crashes when publishing to AIR on an iOS device. Adobe's release notes for version 24.0.15 explicitly call this one out as fixed, so if you're still hitting it, confirm that both Animate and the AIR SDK are updated. The crash typically appeared during the final install step while the app was pushing a build to a connected iPhone or iPad. Keeping iOS and Xcode versions in sync with the AIR SDK version resolves the mismatch that triggers it.
Code hints disappear in the Actions panel. Another known issue squashed in 24.0.15. If autocomplete still isn't popping up for JavaScript or ActionScript in the Code Editor, toggle the Code Hint preferences off and back on under Preferences > Code Editor. A workspace reset — Window > Workspaces > Reset 'Essentials' — often clears out the cached state that gums up the hint engine.
The exported HTML5 Canvas file runs slowly. A heavy timeline with dozens of tweens and filter effects can choke mobile browsers. Before you strip out artwork, check your publish settings: under the HTML5 Canvas export options, turn on "Combine into sprite sheets" and lower the stage's frame rate to 24 fps if it was set higher. Also, vector strokes with excessive anchor points — common after tracing bitmap artwork — drag down performance. Select the offending strokes and run Modify > Shape > Optimize to shave off unnecessary vertices.
Version 24.0.15 smooths out a couple rough edges. The Code Editor once again shows code hints as you type, and a publishing crash that hit AIR apps targeting iOS devices has been squashed.
- macOS 12 or newer
- Apple Silicon or Intel processor
Also on readers' docks
Sign in or create an account to leave a comment.
No comments yet. Tell me how it got on with your other devices.
More in Mac Apps
See all Adobe After Effects
26.5.0 Mac Apps
8.8 GB
Adobe After Effects
26.5.0 Mac Apps
8.8 GB
 Updated Adobe Bridge
16.0.8 Mac Apps
3.7 GB
Updated Adobe Bridge
16.0.8 Mac Apps
3.7 GB
 Adguard
2.18.0.2089 Mac Apps
3 MB
Adguard
2.18.0.2089 Mac Apps
3 MB
 Adobe Dreamweaver
21.8.0 Mac Apps
3.2 GB
Adobe Dreamweaver
21.8.0 Mac Apps
3.2 GB
 Updated Adobe Illustrator
30.8.2 Mac Apps
3.4 GB
Updated Adobe Illustrator
30.8.2 Mac Apps
3.4 GB
 ACDSee Photo Studio
26.0.3 Mac Apps
441 MB
ACDSee Photo Studio
26.0.3 Mac Apps
441 MB
 Updated Adobe InDesign
21.6.0 Mac Apps
1.5 GB
Updated Adobe InDesign
21.6.0 Mac Apps
1.5 GB
 Updated Adobe Lightroom Classic
15.6.0 Mac Apps
3.7 GB
Updated Adobe Lightroom Classic
15.6.0 Mac Apps
3.7 GB